|
The first thing that is needed is to create
the wrist coil so that it is snug but not so tight that it cuts
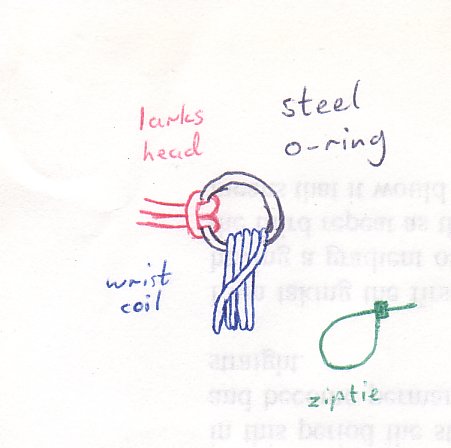
off circulation. Knot the 6 foot rope to form a large loop, a
Reef
Knot is fine but I use a Fisherman's Knot. Coil this loop 5 or 6 times
to shrink it down to size. Place both your wrists through the
coil together, then twist them to form a figure-8 in the coil.
How tight does that feel? To loose, to tight. An addition loop
in the coil will tighten the coil and the reverse is true, you
could also move the knot.
You should now know how many times you
need to feed to rope though the o-ring to create the wrist coil. |
 |
With the wrist coil suitably created it's
time to move on. Fasten the o-ring to the first of the longer
ropes at it's midpoint, I use a Larks head for this as I don't want the ring
to slide around.
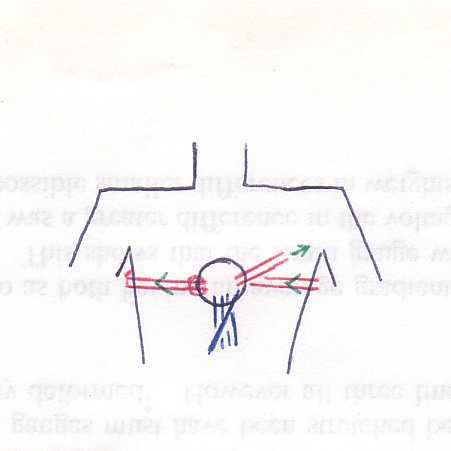
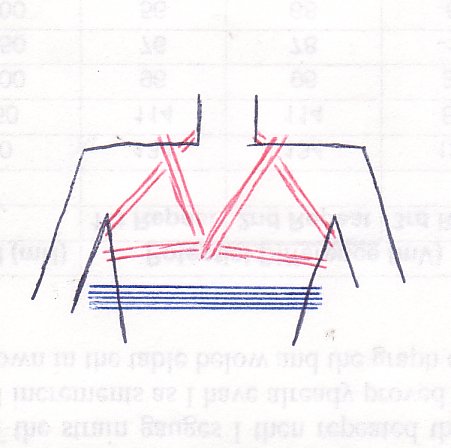
With the ring in place it's time to create
the harness to hold the wrist coil in place in the middle of
your back. In this case I use a modified Bikini/Yoke Harness
(which I learnt from BondageU)
In this case you start with the ring held
in the centre of your back and wrap the rope under your left
arm, around your front, back under your right arm and then feed
it through the ring. (Your could go right then left, the choice
is your's) |
 |
You now have a loop of rope wrapped around
your upper chest just beneath your arms.
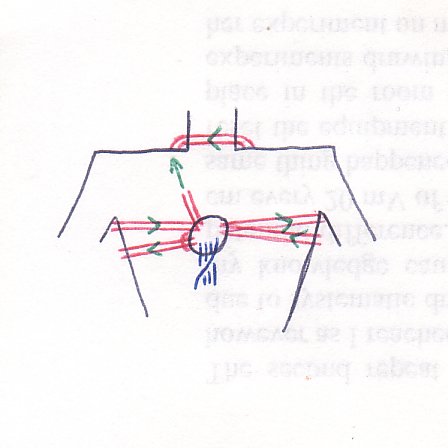
Now bring the rope back under your right
arm, then up over your right shoulder. Then pass the rope behind
your neck (in the manner of a yoke), down the front of your left
shoulder and under your left arm. |
 |
From here feed the rope back through the
ring and then up and over your left shoulder again.
This is a go place to stop and check that
the ring is still in the middle of your back, and to check that
the rope around your chest isn't so tight as to restrict your
breathing.
Remember breathing is important. |
 |
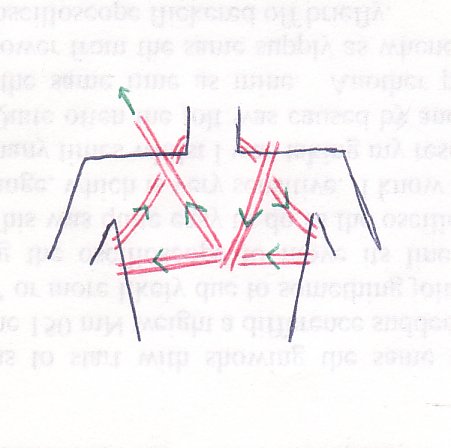
From your shoulder bring the rope down
and wrap it round the chest rope and bring back up and over your
right shoulder.
It should't matter whether you go down
under the chest rope and up over it, or if you go down over the
chest rope and up under it. |
 |
From the right shoulder bring the rope down
and through the ring again. Then bring it back up to the yoke
behind the neck. This makes a good place to tie the harness off,
as it is rather difficult to reach with your hand's trapped in
the wrist coil. |
 |
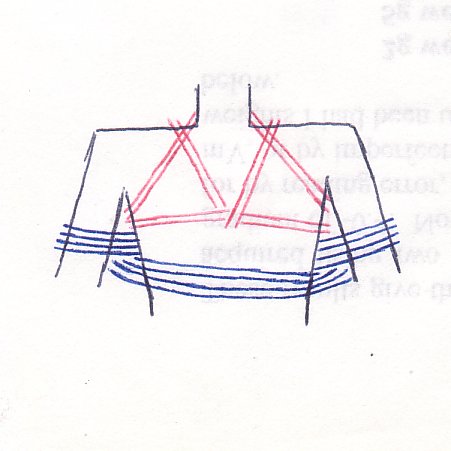
To tie the harness off I tend to bring
the ropes up over the yoke and then down under it. Split them
so they are separated by themselves, and then tie off the harness.
Again a Reef Knot is fine.
The image left should give you a idea as
to how this should end up.
Please Note: I tend to double the ropes
over the shoulders to reduce to chances of the ropes digging
in uncomfortably. |
 |
This next bit is optional, but here it
is.
Much like the wrist coil set-up, the body-coil
(20ft rope number 2) requires careful adjustment to ensure it
is just tight enough.
Knot the rope into a large loop and then
coil it 5 or 6 times. Then place the rope around your body under
your arms. |
 |
We'll start with the right arm (because
that's the one I drew). Bring your arm up and under the ropes,
then over and down to create a figure-8 in the body-coil with
your body in one loop and your upper arm in the other.
Then repeat with your left arm. |
 |
This coil is quite awkward to adjust to
an appropriate tightness. As you need it tight enough that it
won't slip off your upper arm past your elbows. Yet at the same
time you need to avoid placing to much pressure around your chest.
Remember breathing is important.
Getting this right will likely require
several attempts. |
 |
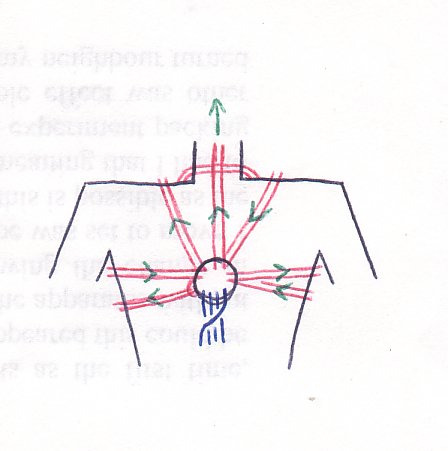
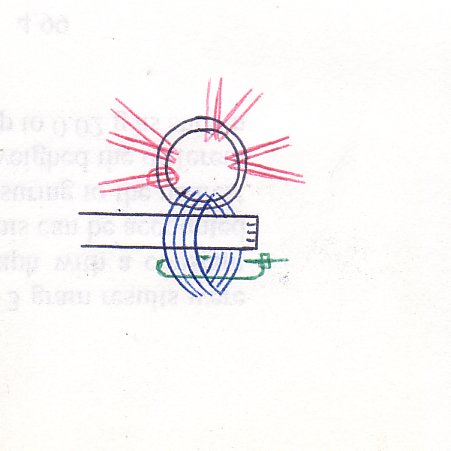
Now its time for the end game.
Placing one hand through the wrist coil
(yes it is a hand, you can see the fingers...ish), taking care
not to tangle the strands. Then slide a looped cable-tie up around
the wrist coil until as much of the coil is through the cable-tie
as possible.
Next is the difficult bit. |
 |
You need to pass your other hand though
the coil in the same direction as the first. So that when your
arms are crossed behind your back the wrist-coil form a figure-8
around your wrists.
At this point there should be a cable-tie
looped around the crossed ropes and between your wrists.
This is the point where getting out goes
from difficult to virtually impossible. So... are you going to
pull that cable-tie tight? |